
14 July 2026
By Rob — bench hand joiner, time served
How to Build a Timber Stud Partition Wall
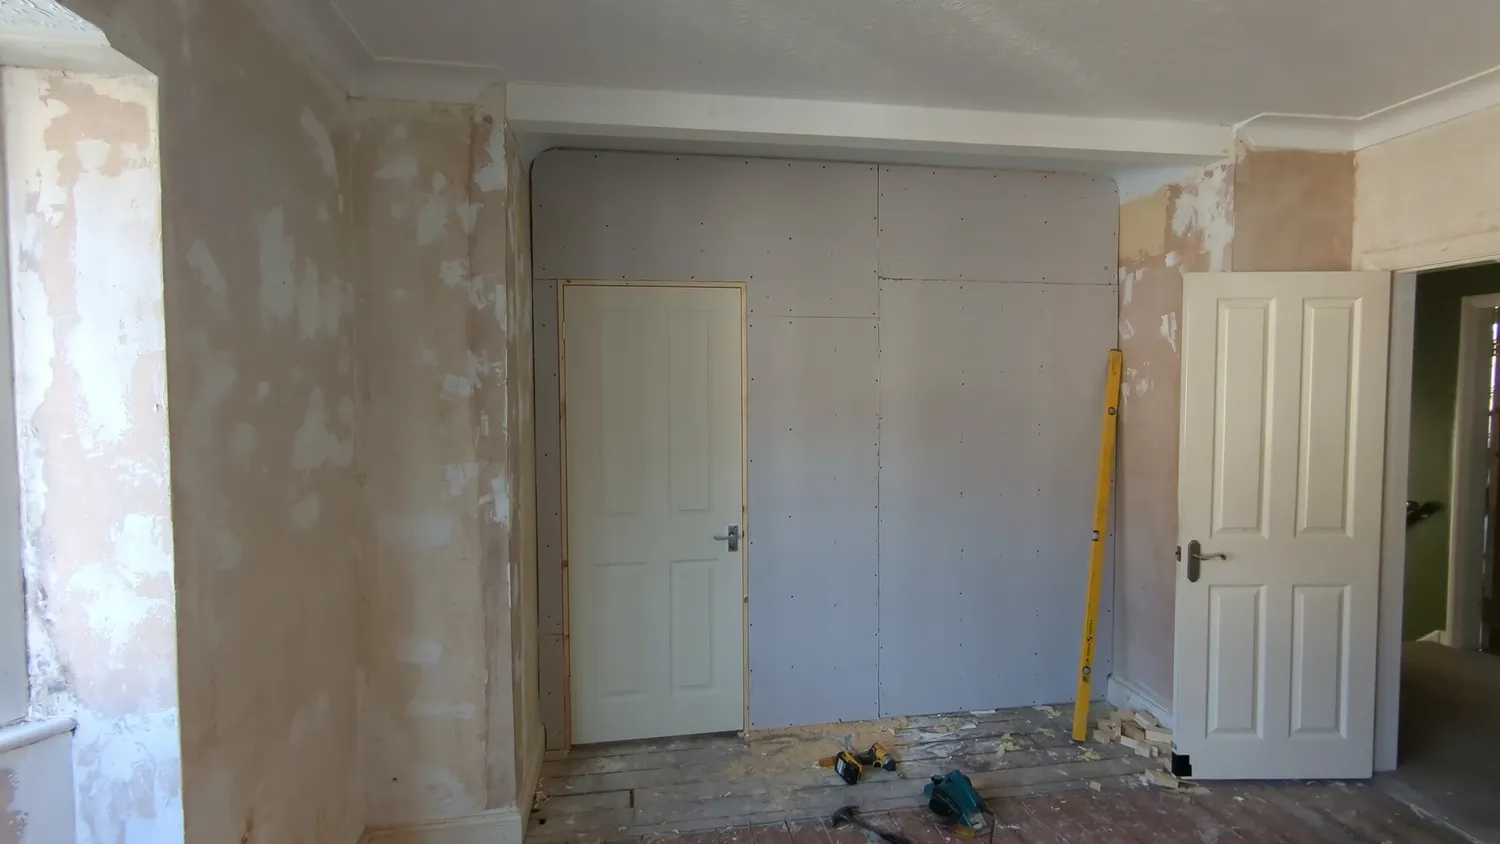
We recently built a new timber stud partition wall at a property in Doncaster, working for a local builder. The wall created a separate en-suite bathroom, with a new doorway, plasterboard lining and acoustic insulation.
A stud wall looks straightforward, and that’s exactly why so many get built badly. The truth is the setting out decides how the whole job goes. The wall has to be straight, plumb and square, and every plasterboard joint needs to land on solid timber. Get that right at the start and everything after it falls into place.
Here’s the process we use, from marking out the original room through to hanging the finished door.
1. Planning the position of the new wall
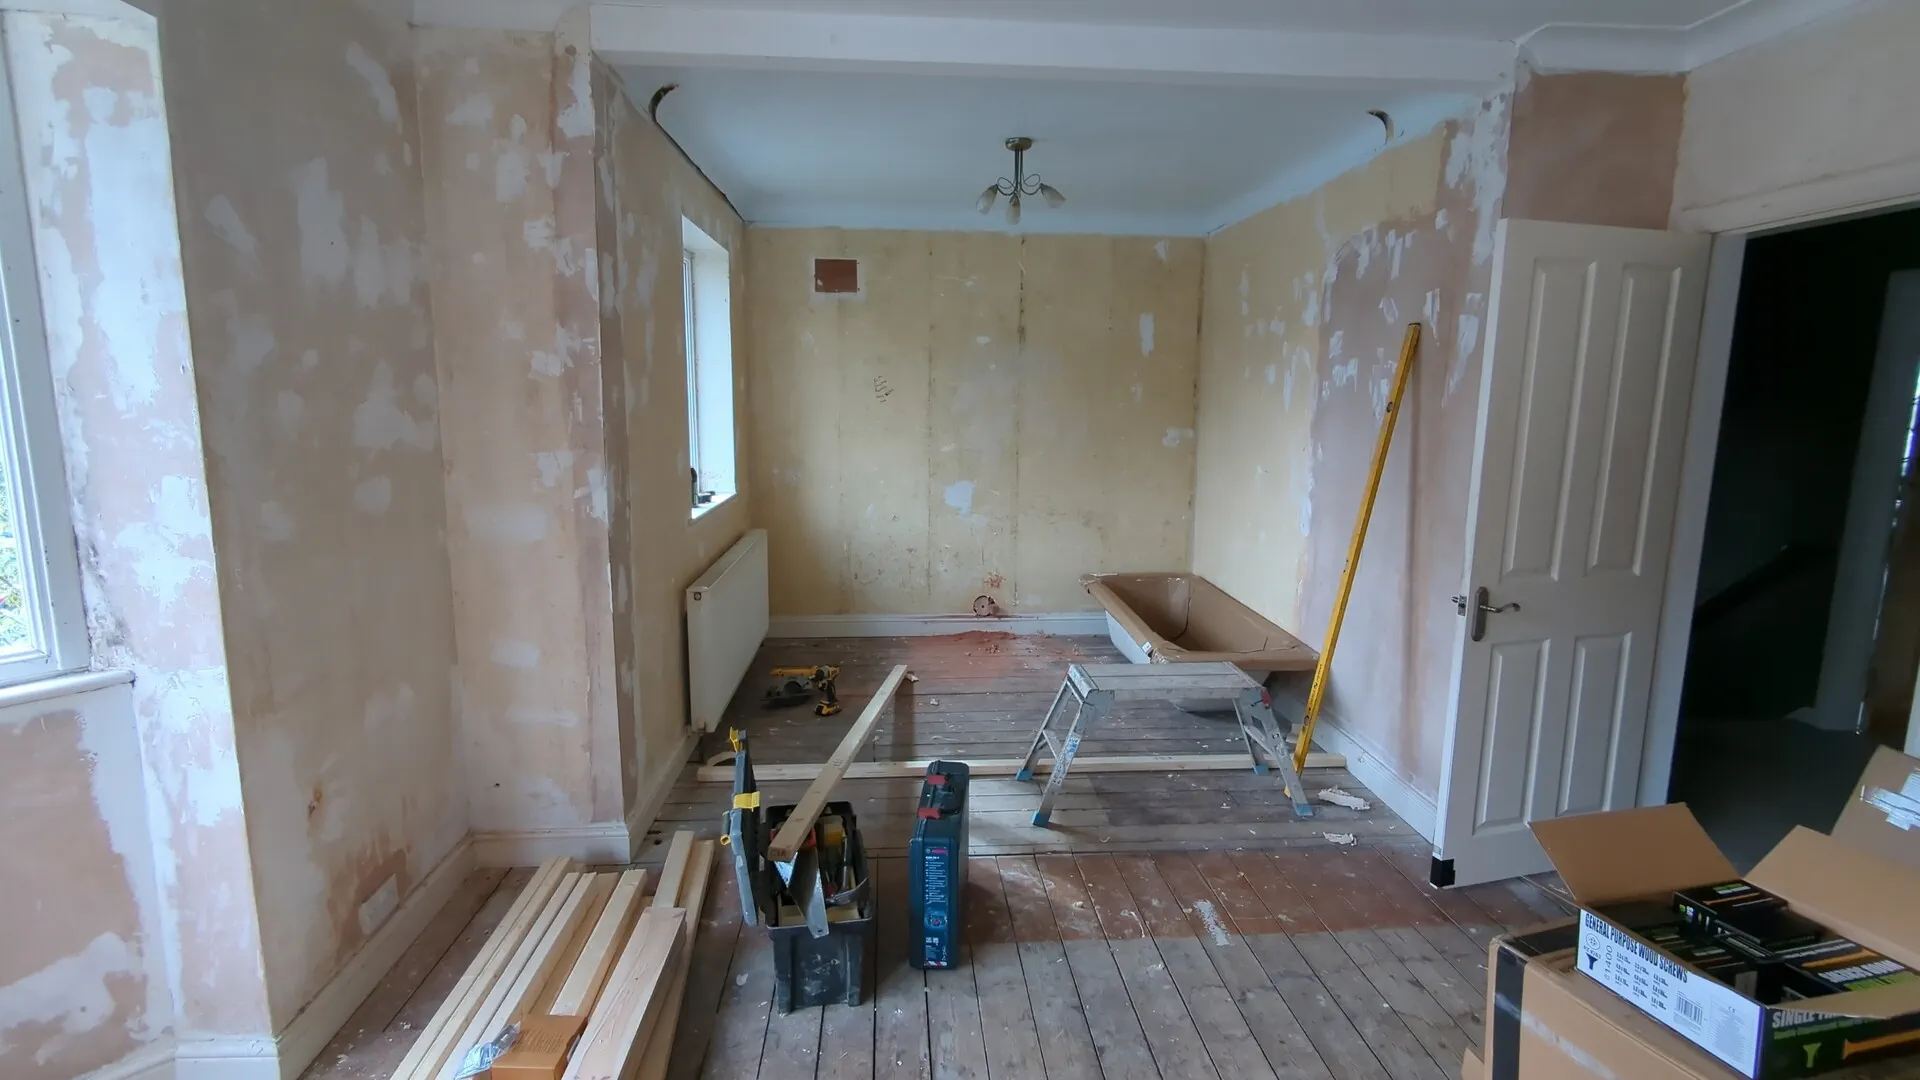
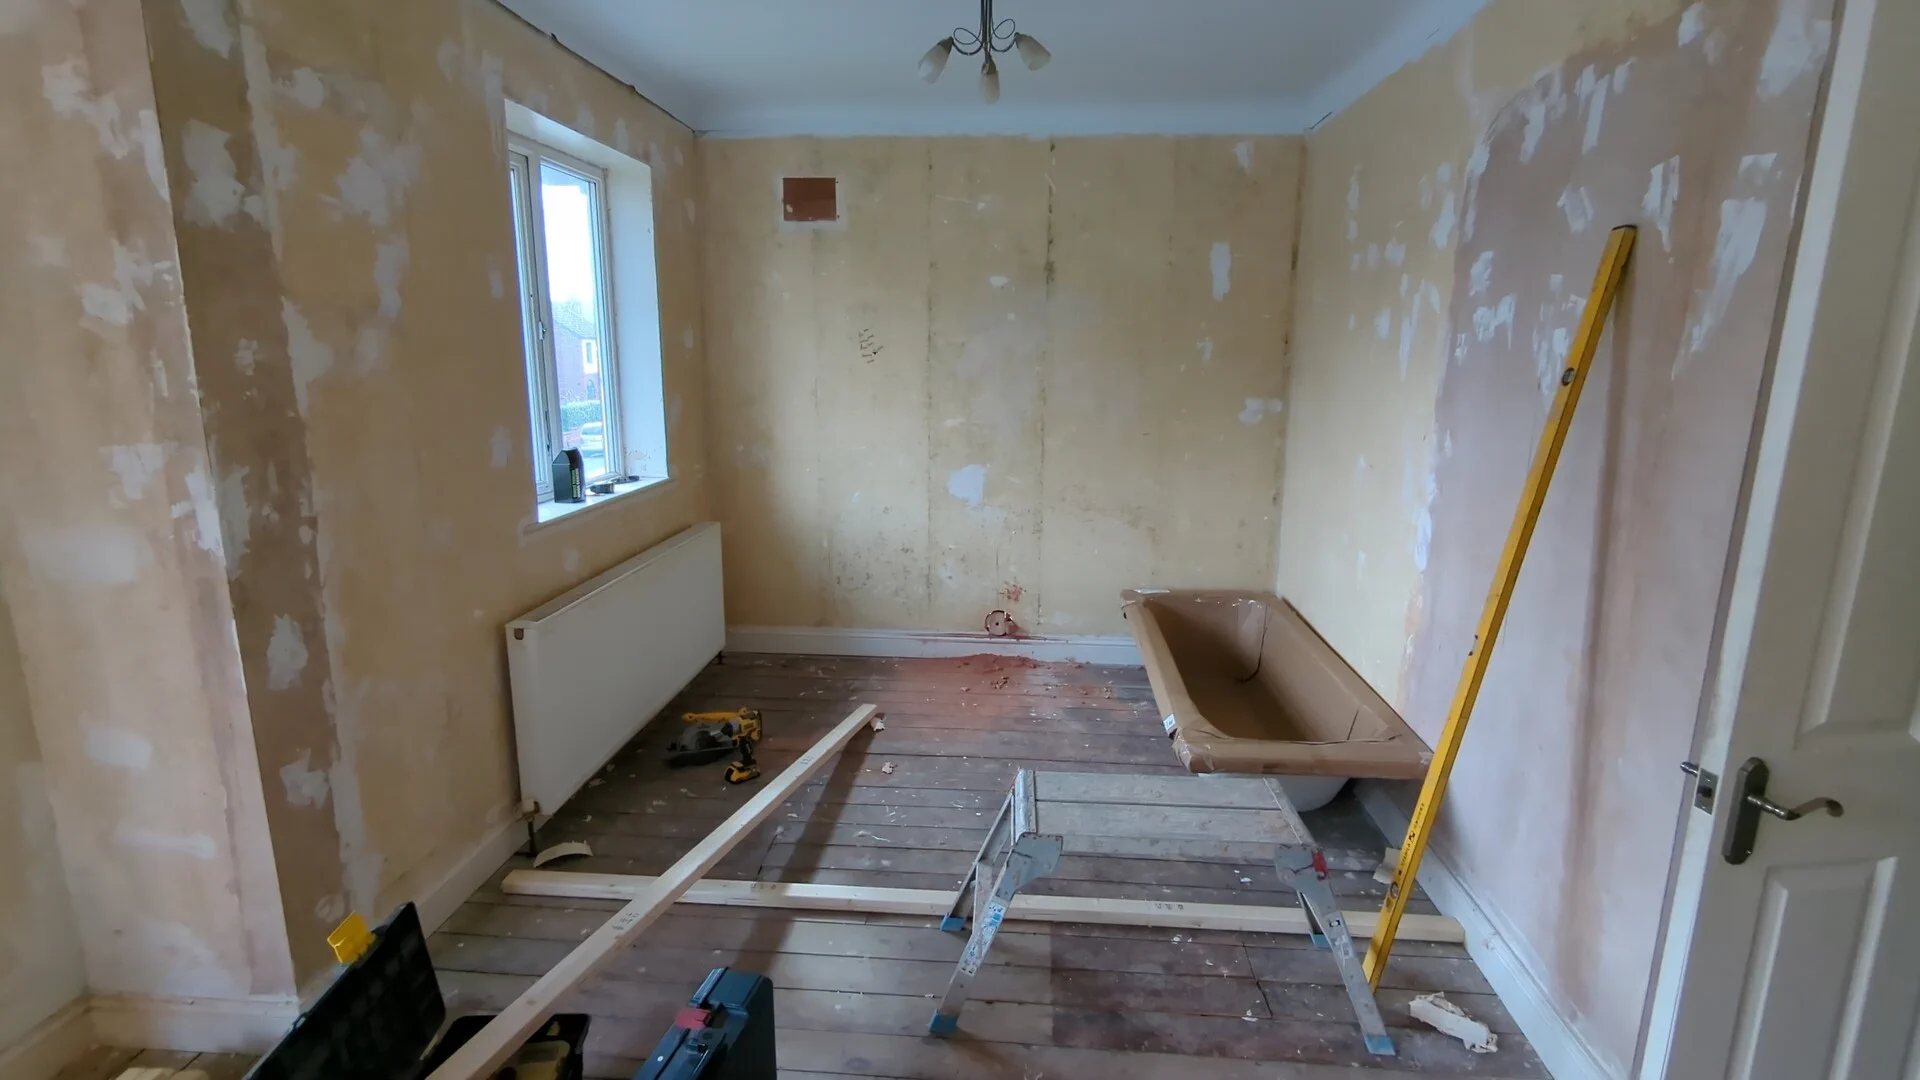
Before fixing any timber, we established exactly where the new partition needed to stand.
Plumb lines were marked on both existing walls to show the position of each end of the new partition. We then measured from the far wall of the proposed en-suite to make sure the new room stayed square.
The far side of the larger room mattered less — it was some distance away. The critical measurement was the internal size and squareness of the new en-suite.
2. Setting out the studs to match the plasterboard
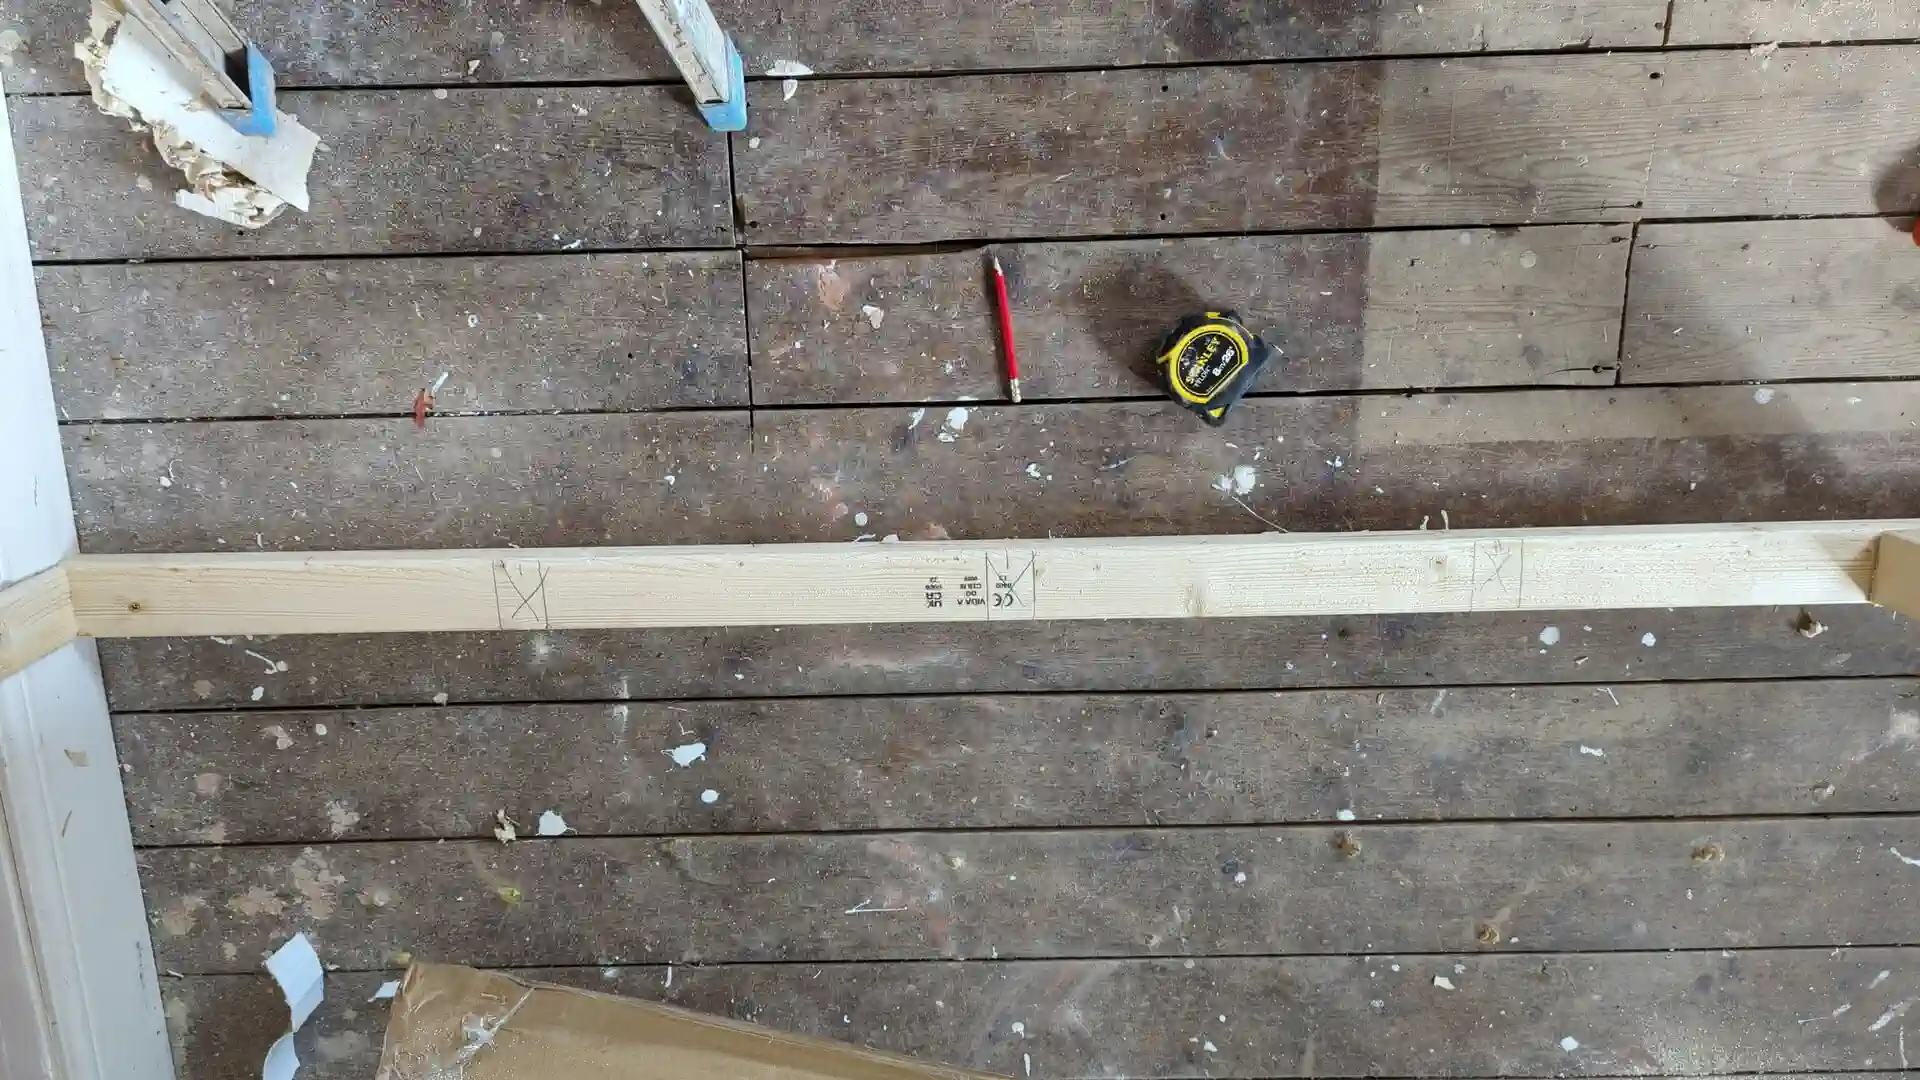
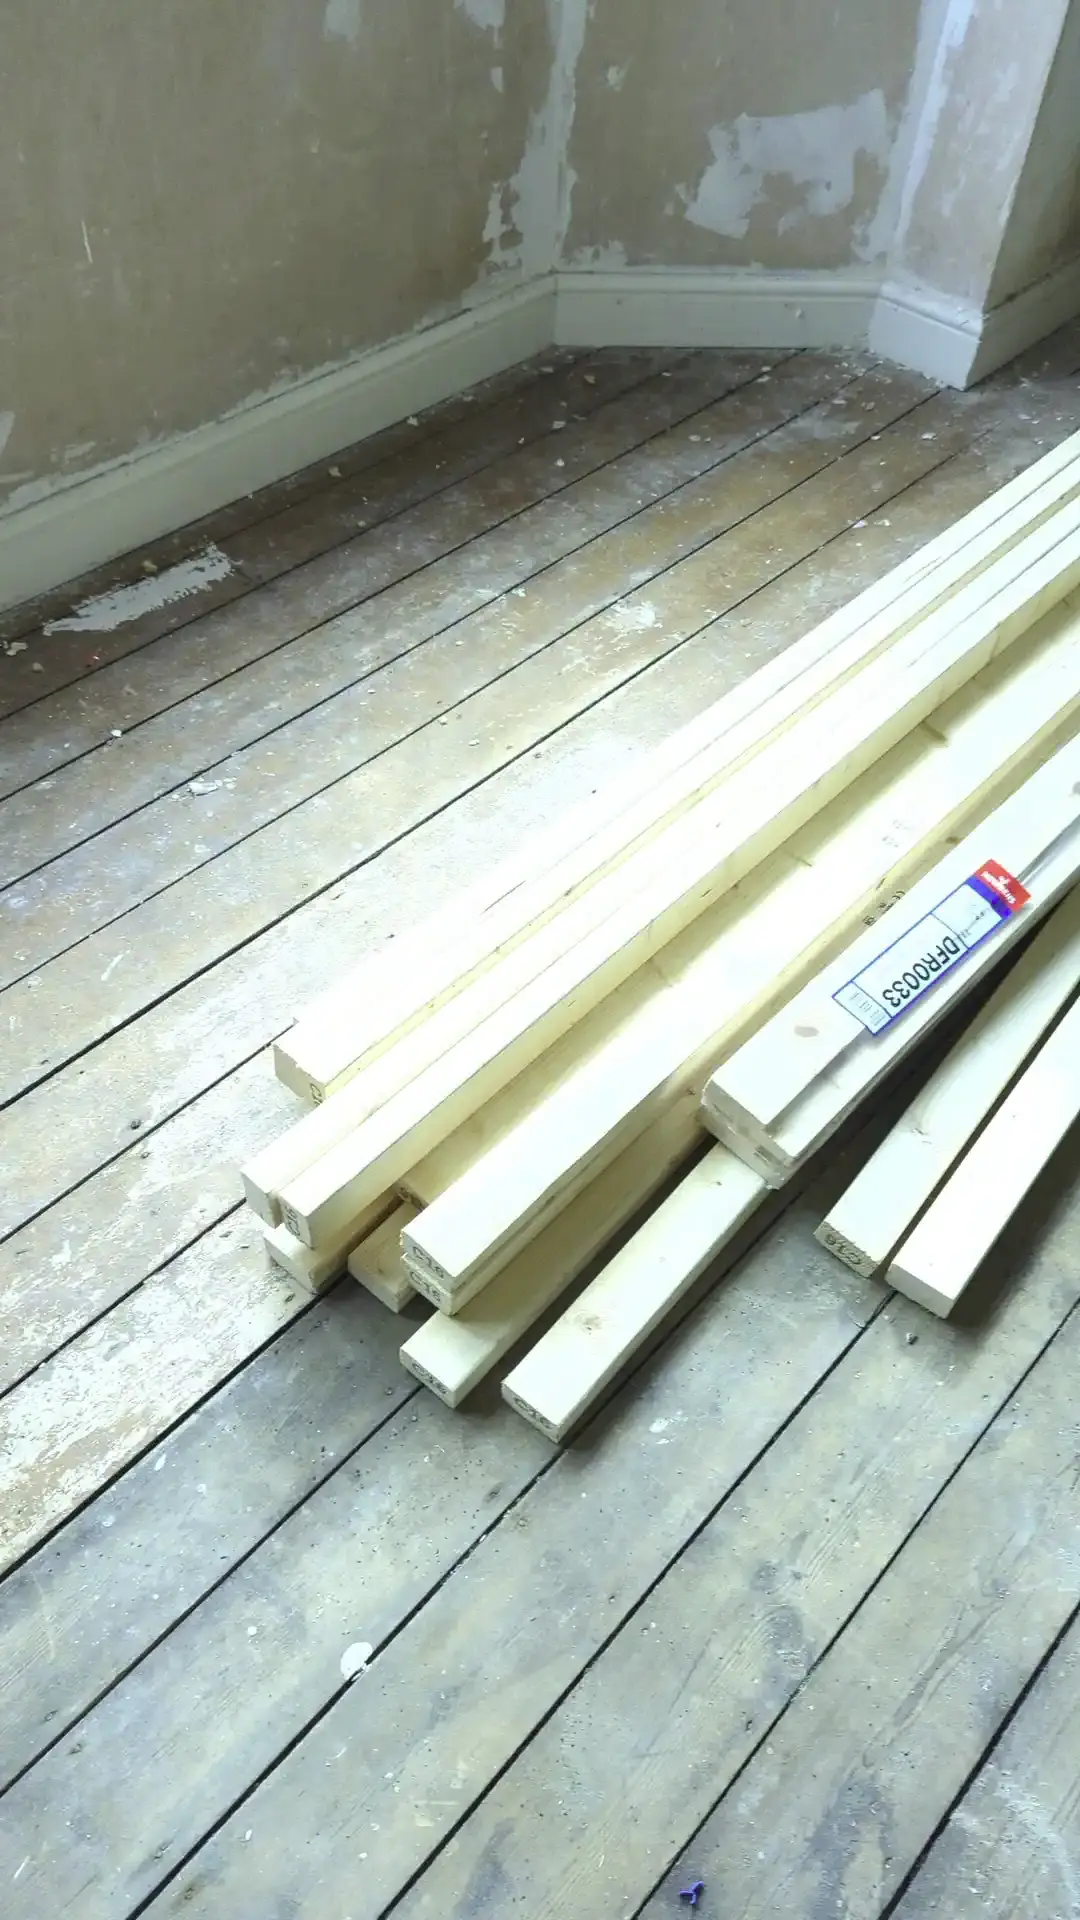
The sole plate was marked out before the frame was assembled. On this wall, the studs went in at 400mm centres.
The spacing matters because the edges and joints of the plasterboard must land centrally on solid timber. Poor setting out leaves board joints unsupported, or the boards gradually miss the studs further along the wall.
Just as important: check the actual width of your plasterboard before setting out the frame.
Modern metric plasterboard is normally 1200mm wide and works with studs at 400mm centres — 400mm × 3 spaces = 1200mm. But genuine four-foot imperial boards are about 1219mm wide and suit studs at 16-inch (406.4mm) centres.
Never rely on a board being described as “8 × 4”. Measure it before you set out the studwork.
3. Fixing the sole plate and head plate
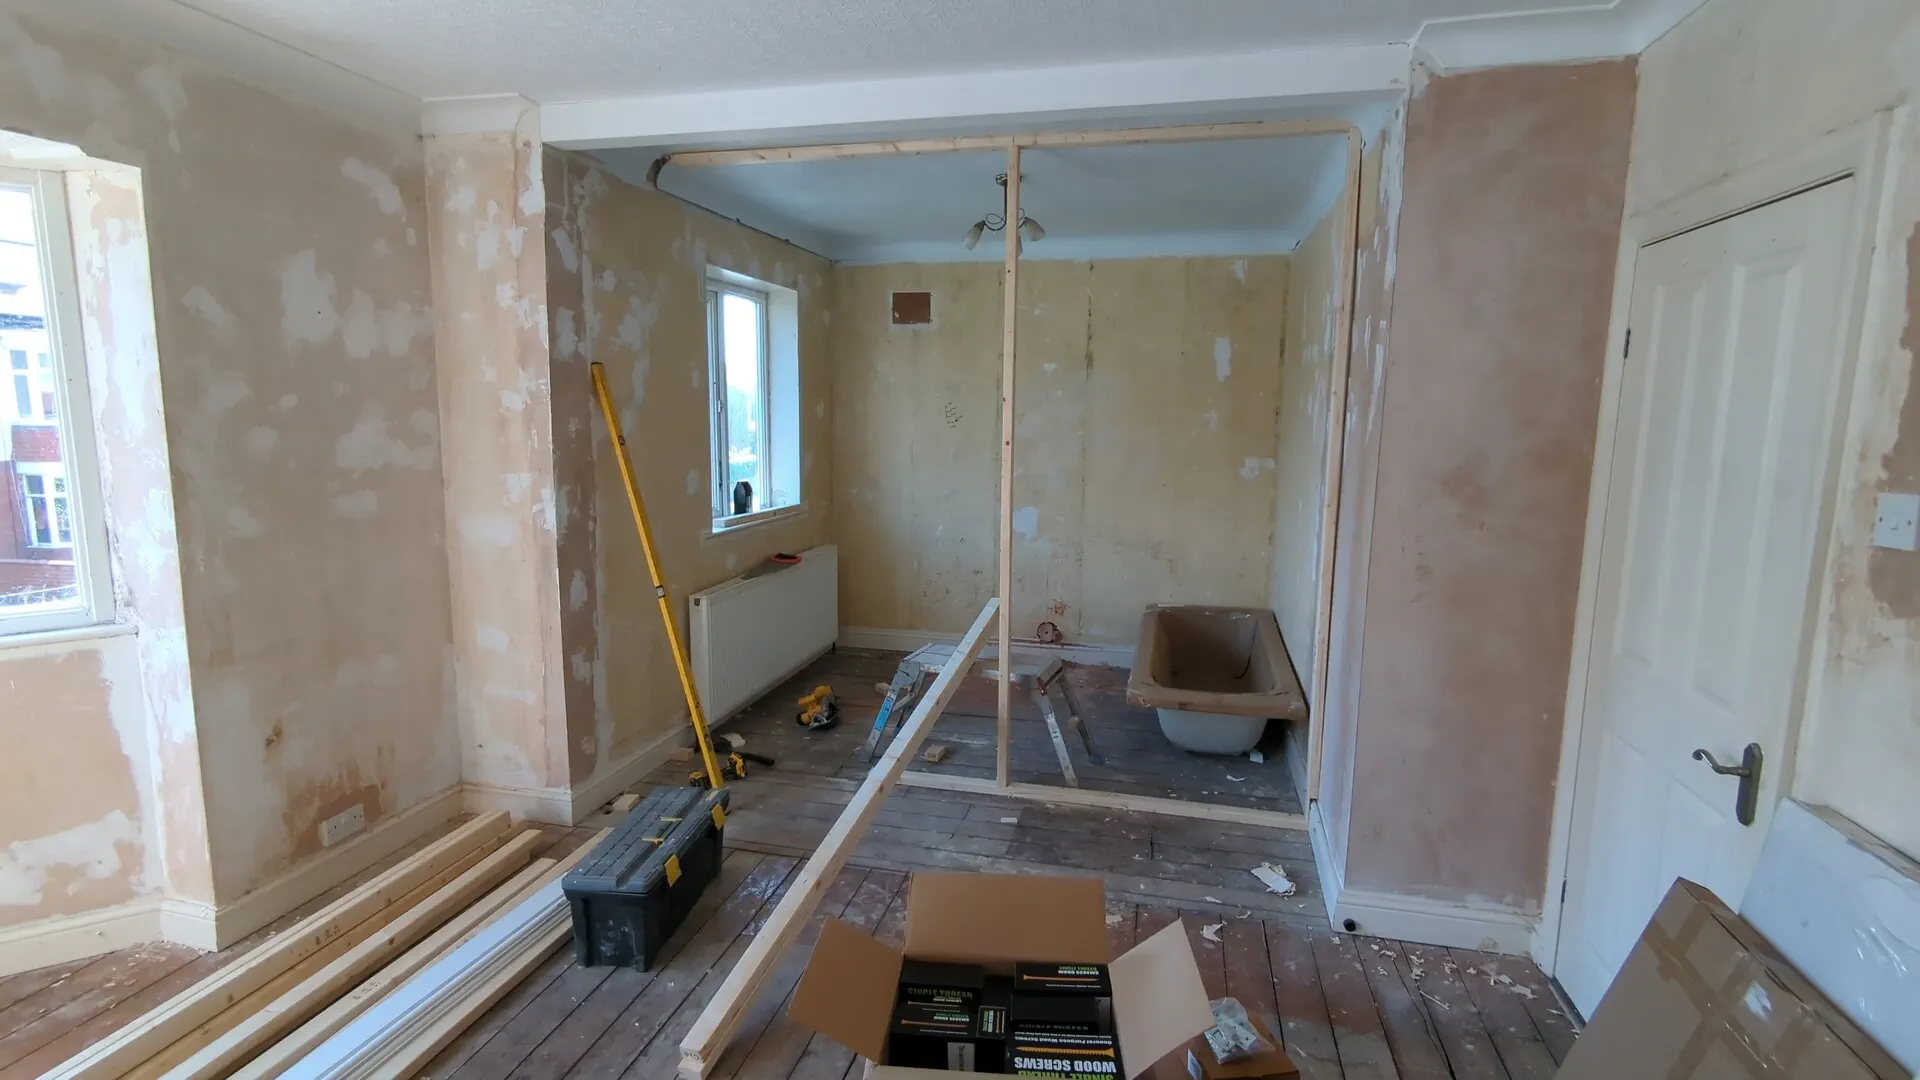
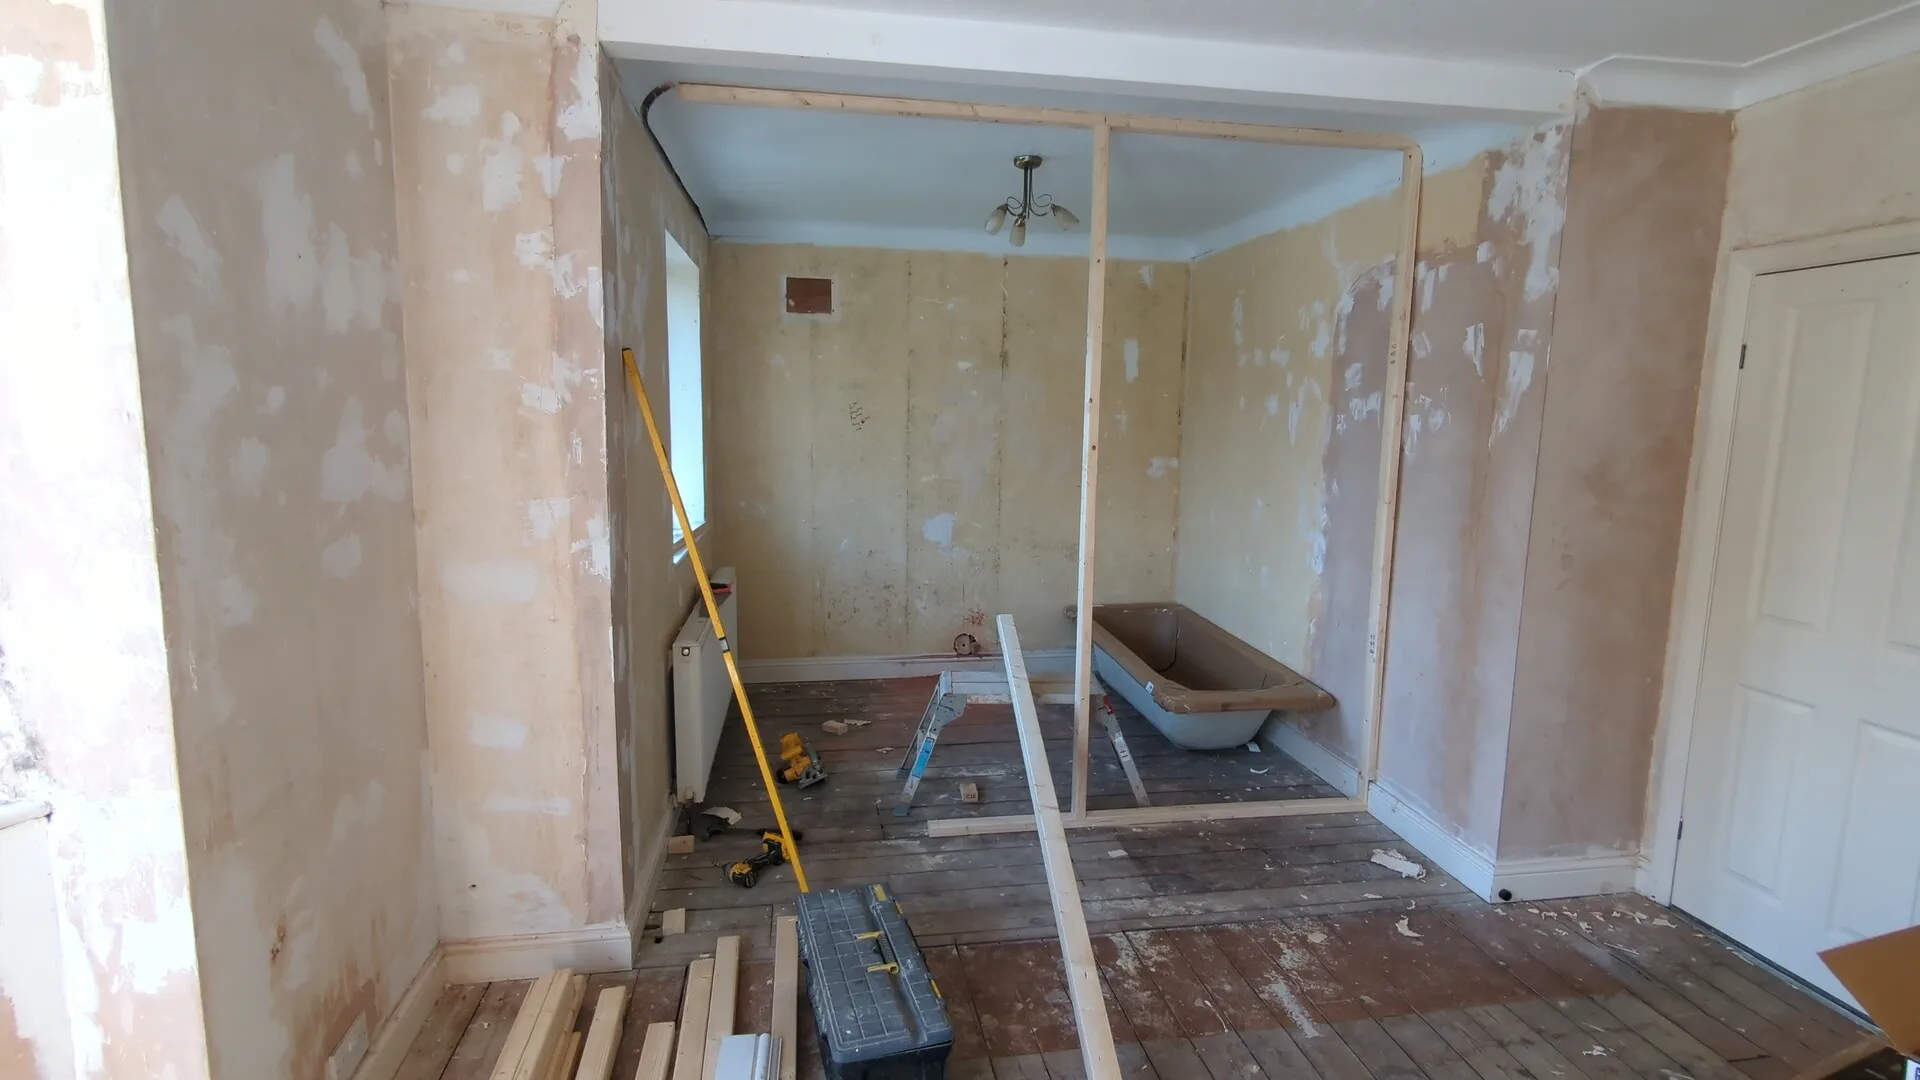
With the position confirmed, the sole plate was fixed to the floor and the head plate went in above it.
A few temporary studs were then used to sprag the frame into position. That let us adjust the wall, check the measurements and make sure everything was plumb and level before permanently fixing the rest of the studs.
At this stage it’s better to spend the extra time checking than to carry on building a wall that’s slightly out. The main checks:
- Both ends of the wall are plumb
- The head and sole plates line up
- The wall is straight along its full length
- The new room is still square
- The doorway is in the right position
4. A stronger overlapped joint at the door studs
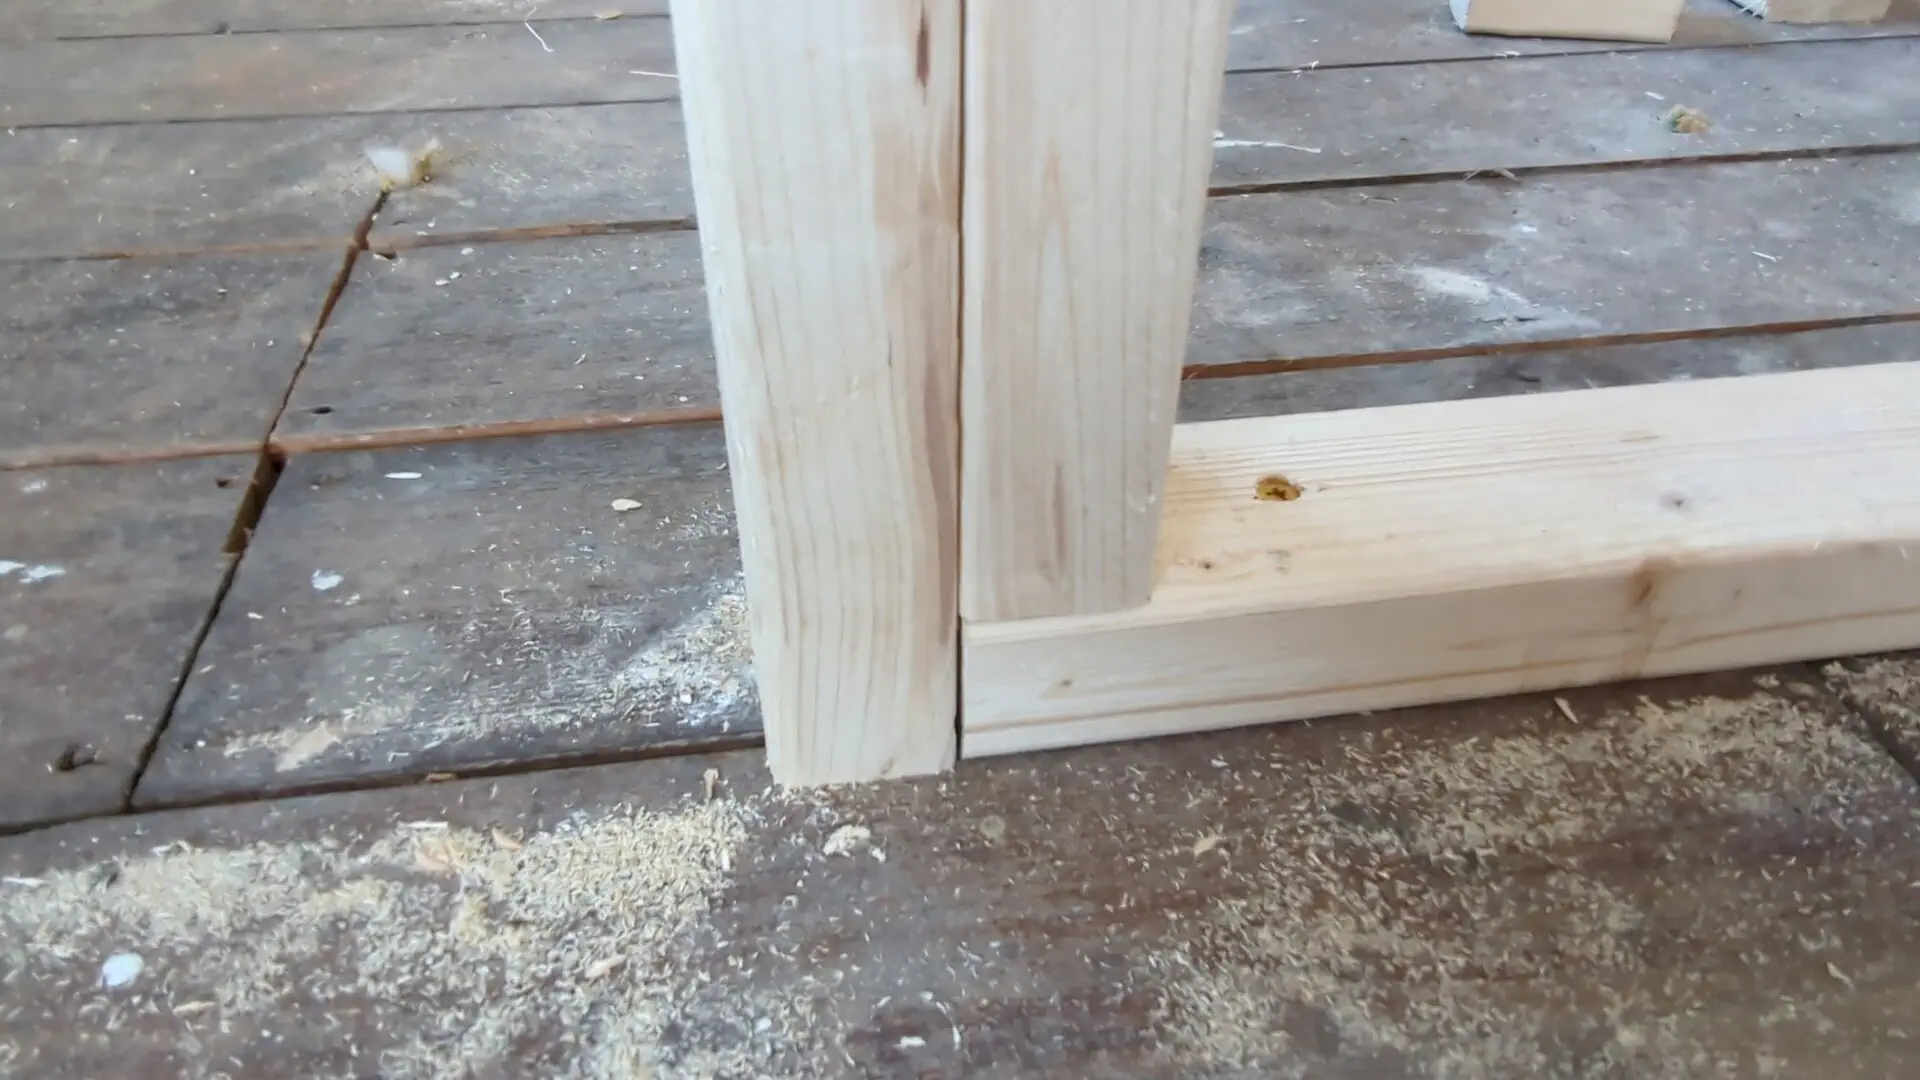
Wherever there’s a double stud — at the door frame — I prefer to run the stud full height, from the floor right up to the head plate, with the sole plate tied into the side of it rather than the stud sat on top.
That creates an overlapping connection that binds the frame together at the opening, and it lets the door stud be fixed directly down into the floor structure. In my experience it’s a neater and stronger joint than a short stud perched on the sole plate — exactly where the wall takes the most punishment from the door.
5. Strengthening the new door opening
Door openings need particular attention, because they interrupt the regular run of studs and introduce movement into the wall. Doors get opened, closed and sometimes slammed, day in, day out. Without enough timber around the opening, that movement transfers into the partition and cracks the plaster or works the frame loose.
We doubled the upright studs around the doorway, with a strong king-stud arrangement. That gives the door frame a substantial fixing point and stiffens what would otherwise be the weakest part of the wall.
The opening also needs checking carefully for:
- Correct width and height
- Plumb jambs
- A level head
- Enough allowance for the door lining and adjustment
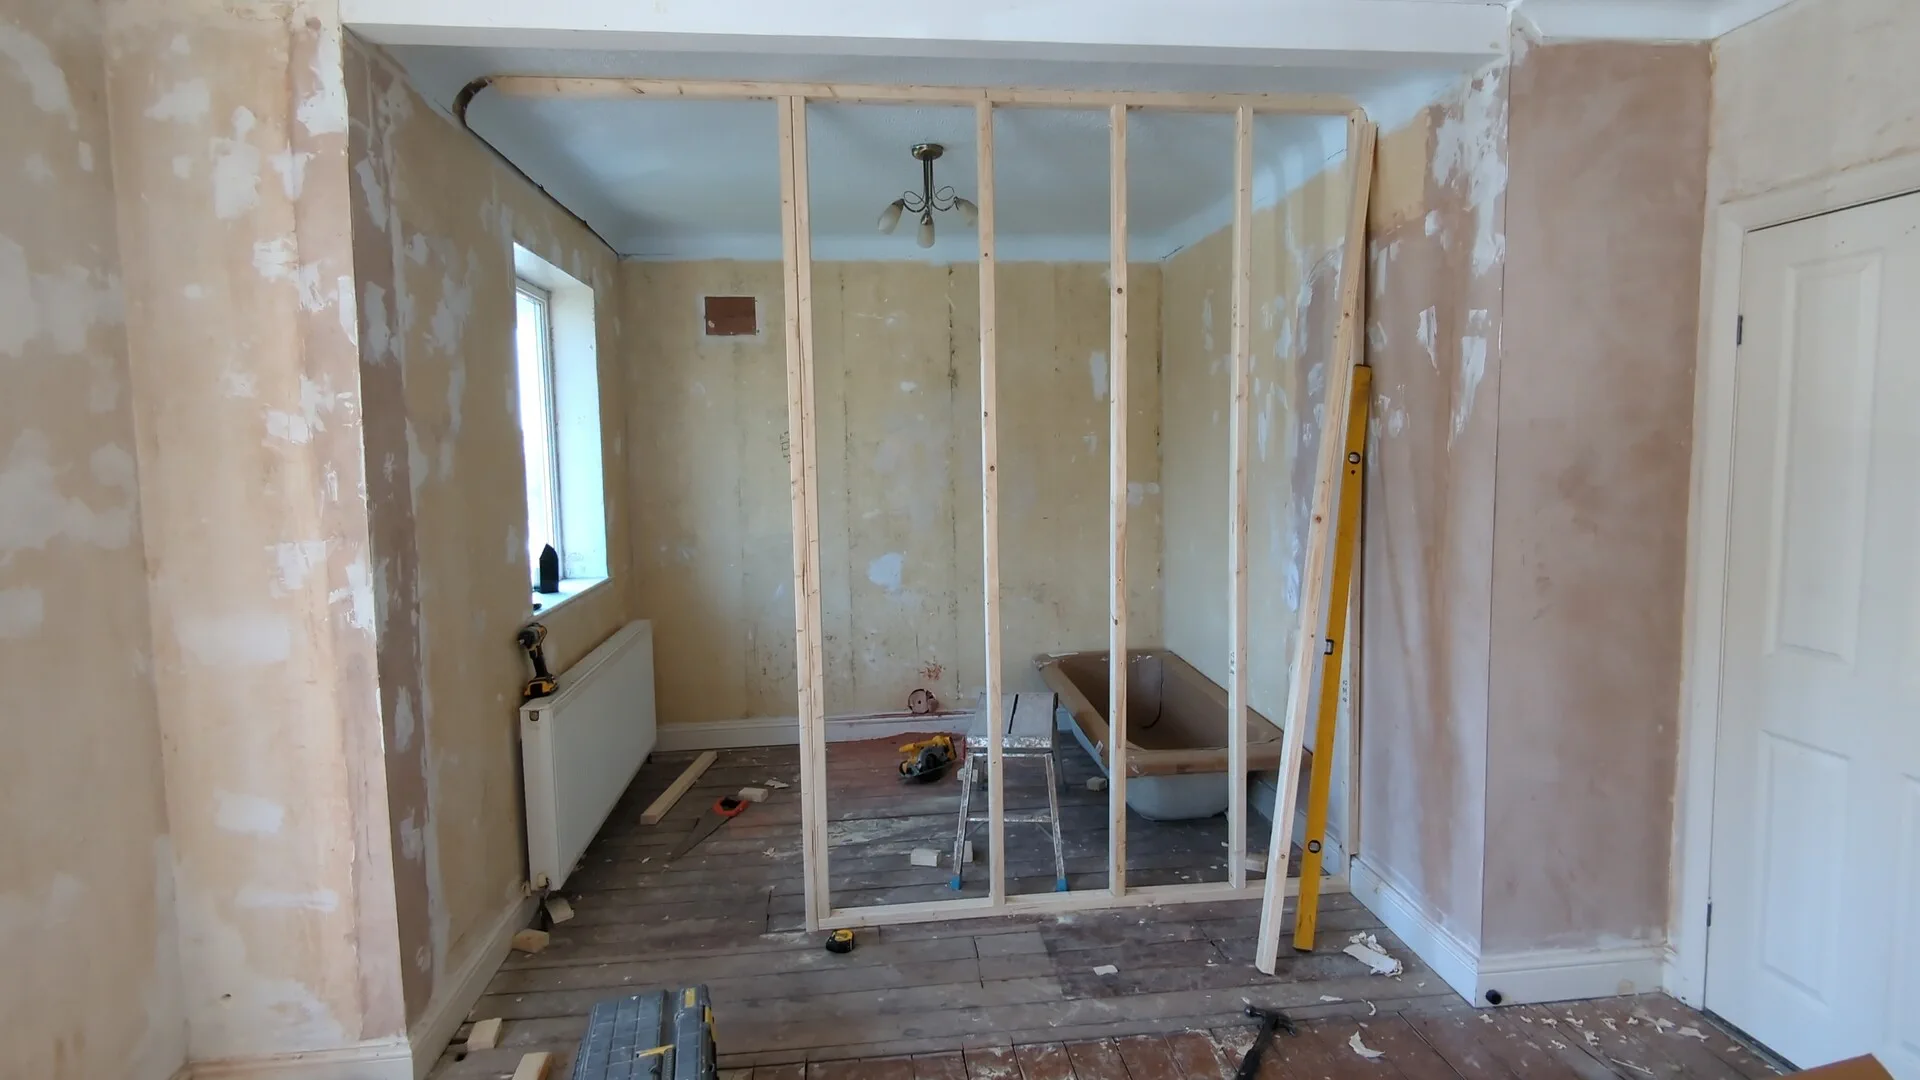
6. Installing the remaining studs
With the outer frame and doorway established, the remaining studs went in at the marked 400mm centres.
Every stud was checked for plumb before being fixed. It’s also worth sighting along the face of the wall to make sure none of the timbers are twisted or standing proud. Even when the top and bottom measurements are spot on, a twisted or bowed stud causes problems when the plasterboard goes on.
The aim is one flat, straight plane across the whole face of the wall — that, more than anything, is what good stud wall framing comes down to.
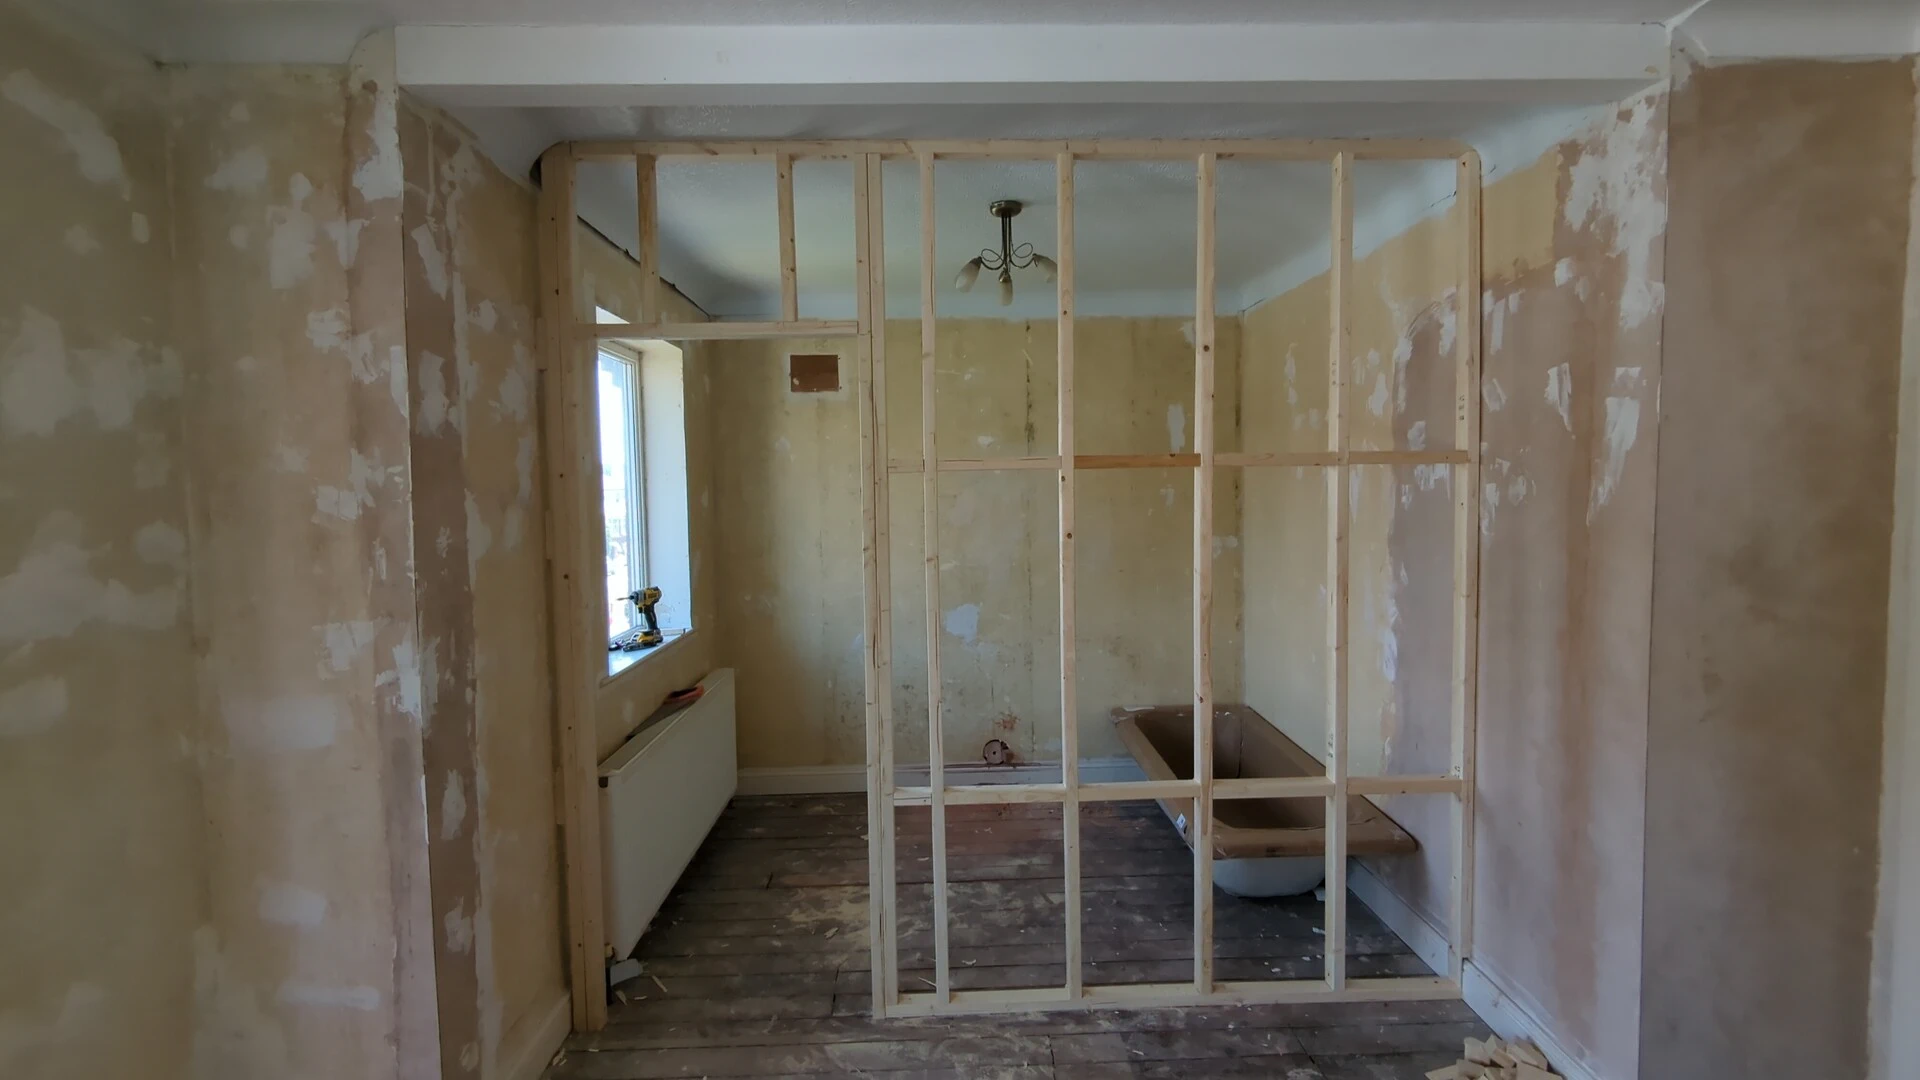
7. Fitting two rows of noggins
A lot of basic stud partitions get built with one central row of noggins. On this job we fitted two.
Noggins tie the vertical studs together and make the finished wall feel considerably more rigid. They also stiffen the wall against everyday knocks at the heights where they actually happen — knee height, waist height, furniture, people leaning — and they give solid fixing positions for whatever gets hung on the wall later.
I also like the noggins kept in consistent, straight horizontal lines. It looks more professional in the frame, and it gives anyone working on the property later a predictable line of solid timber for fixings.
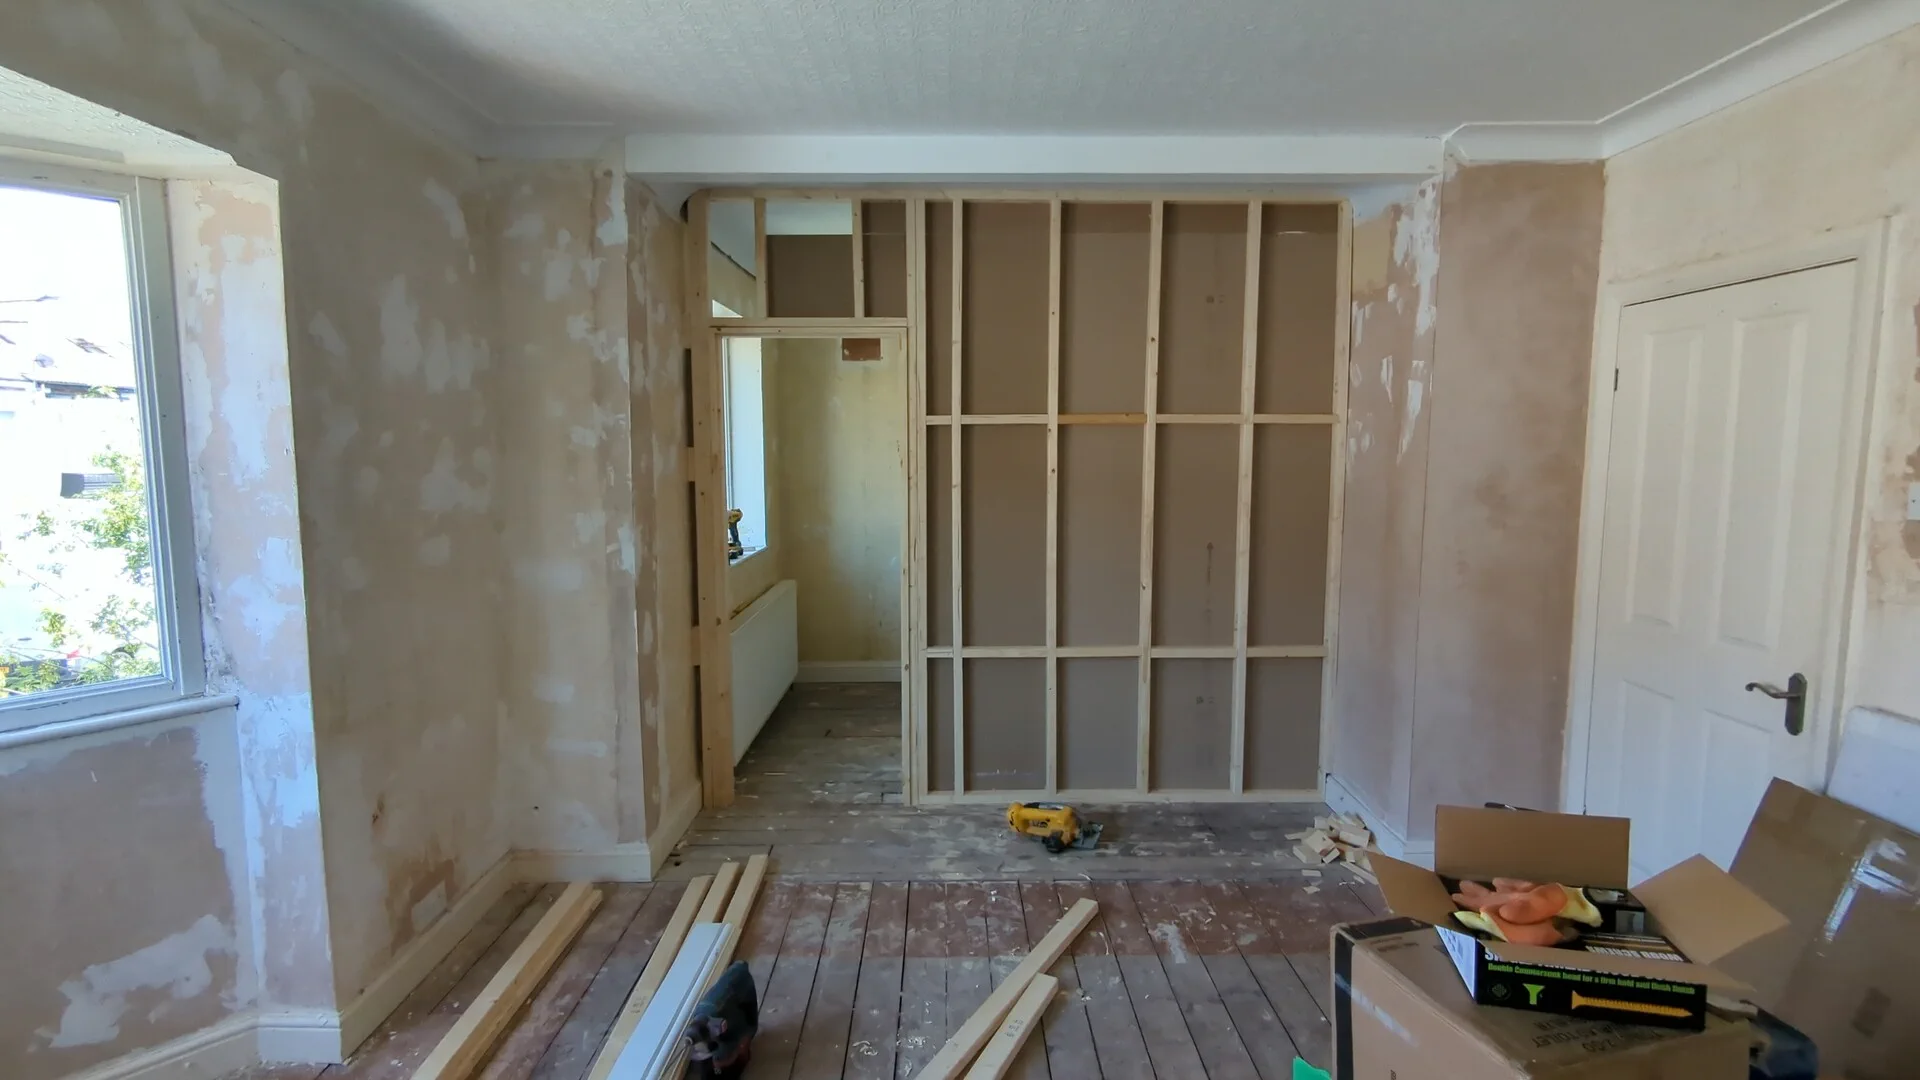
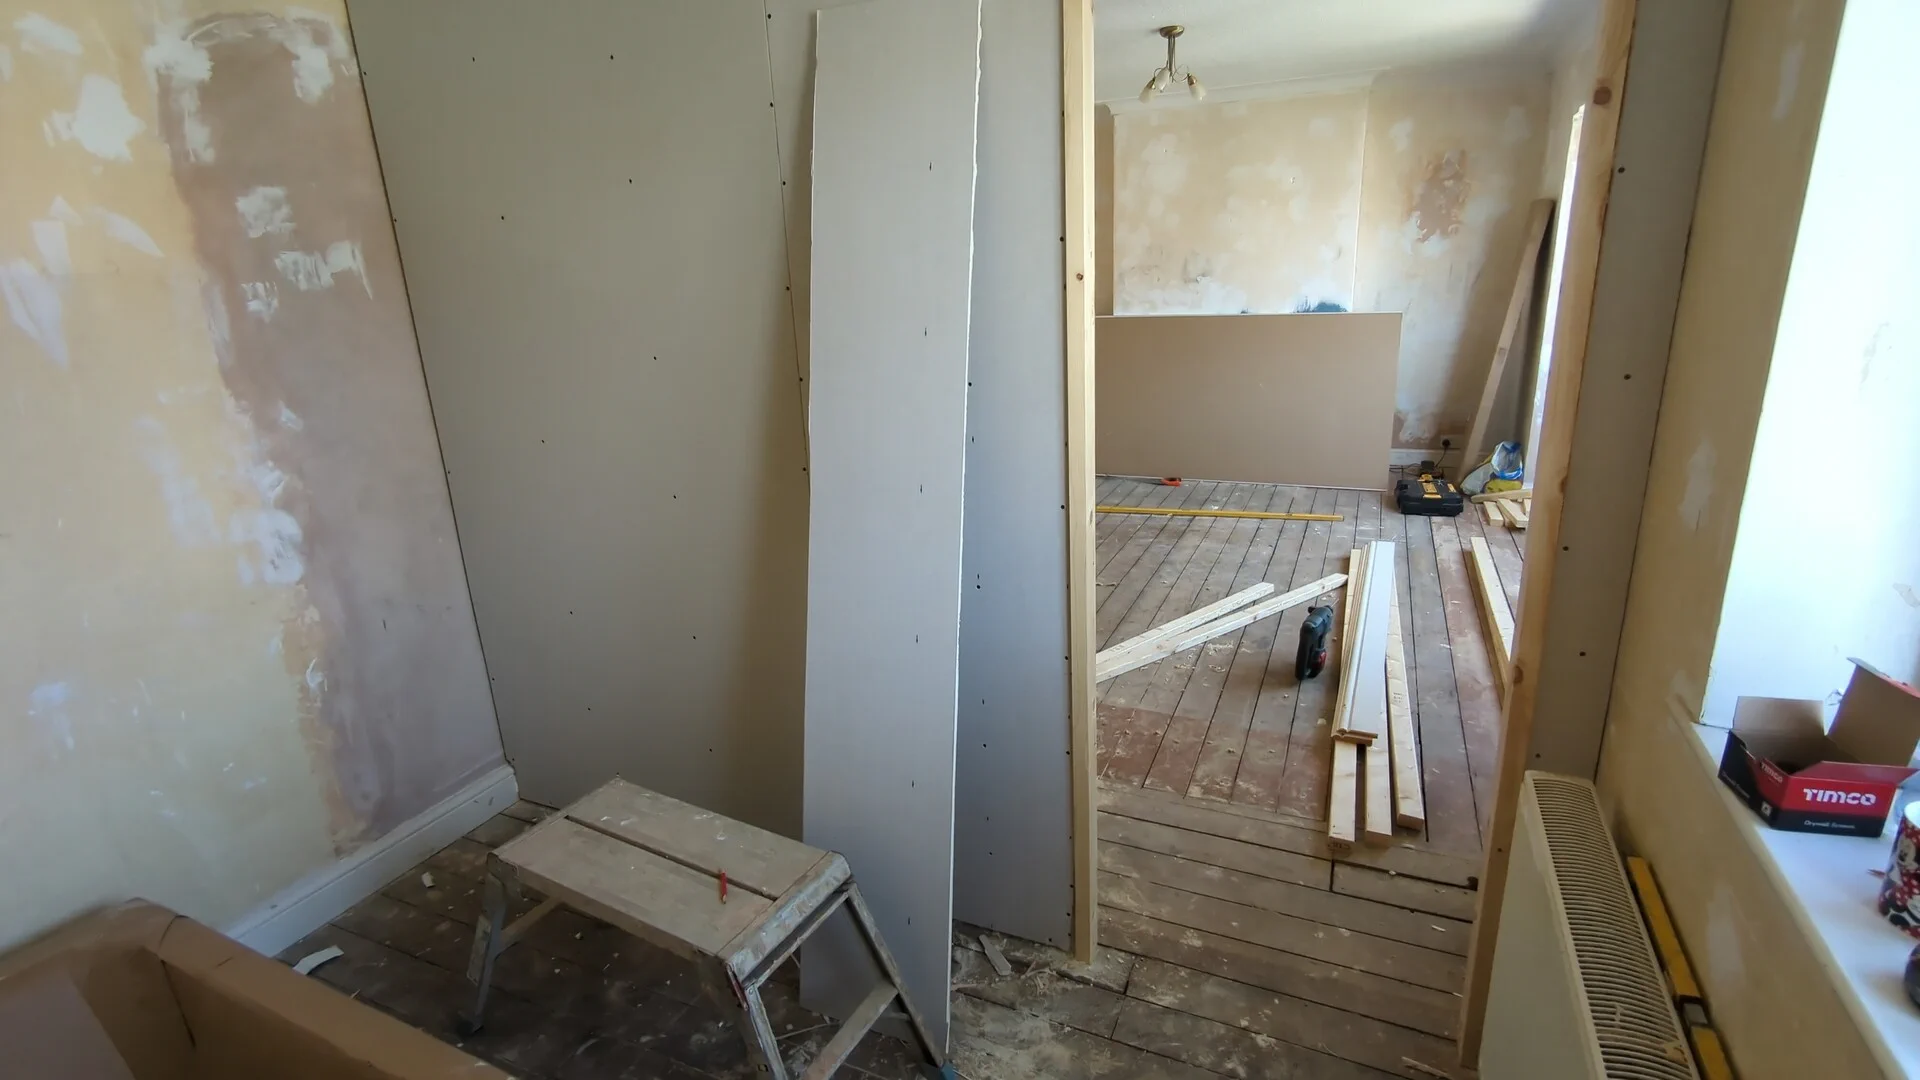
8. Door lining in, and one side boarded
After completing the frame, the door lining was installed and carefully adjusted, then one side of the partition was plasterboarded.
Boarding one face first closes the cavity while leaving the other side open for insulation, cables or other services. Board edges were positioned over the centre of the studs so both adjoining boards have a secure fixing, and screws driven just below the face of the board without tearing the paper.
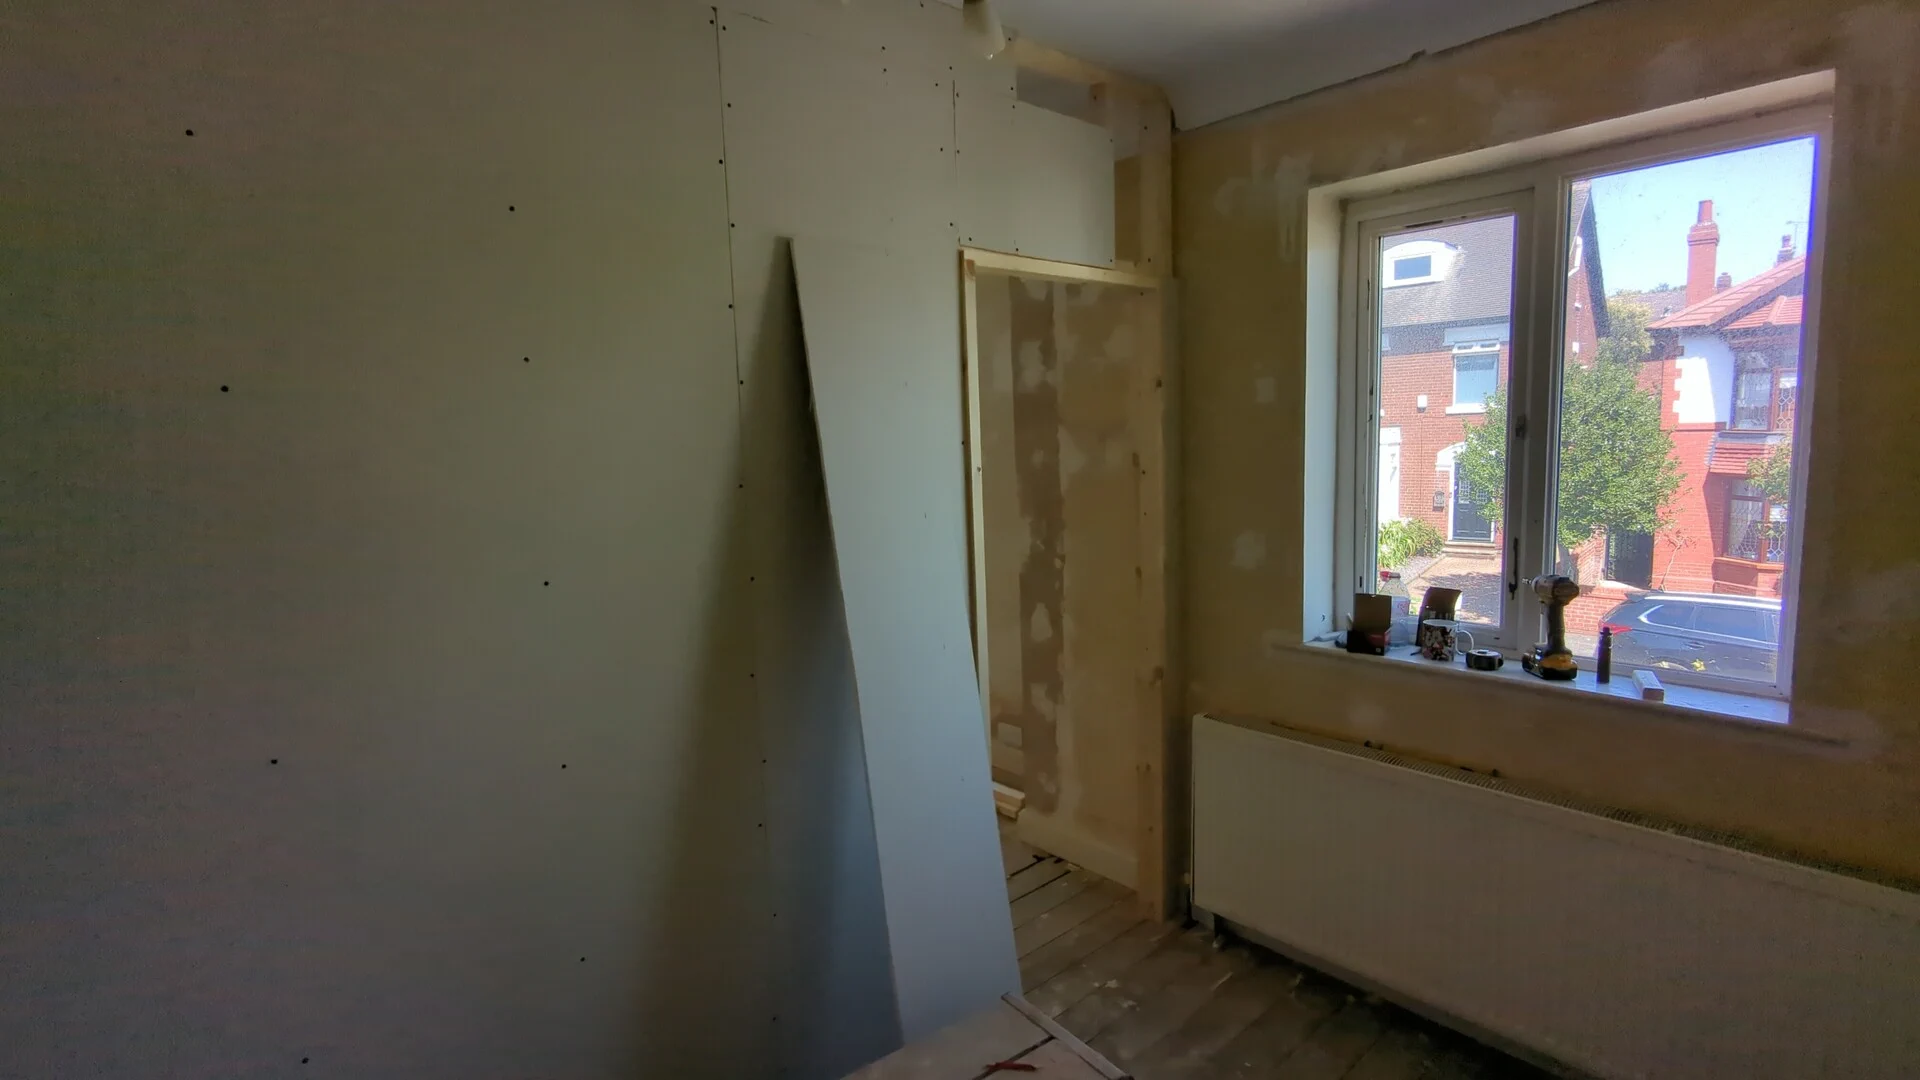
9. Insulating the partition
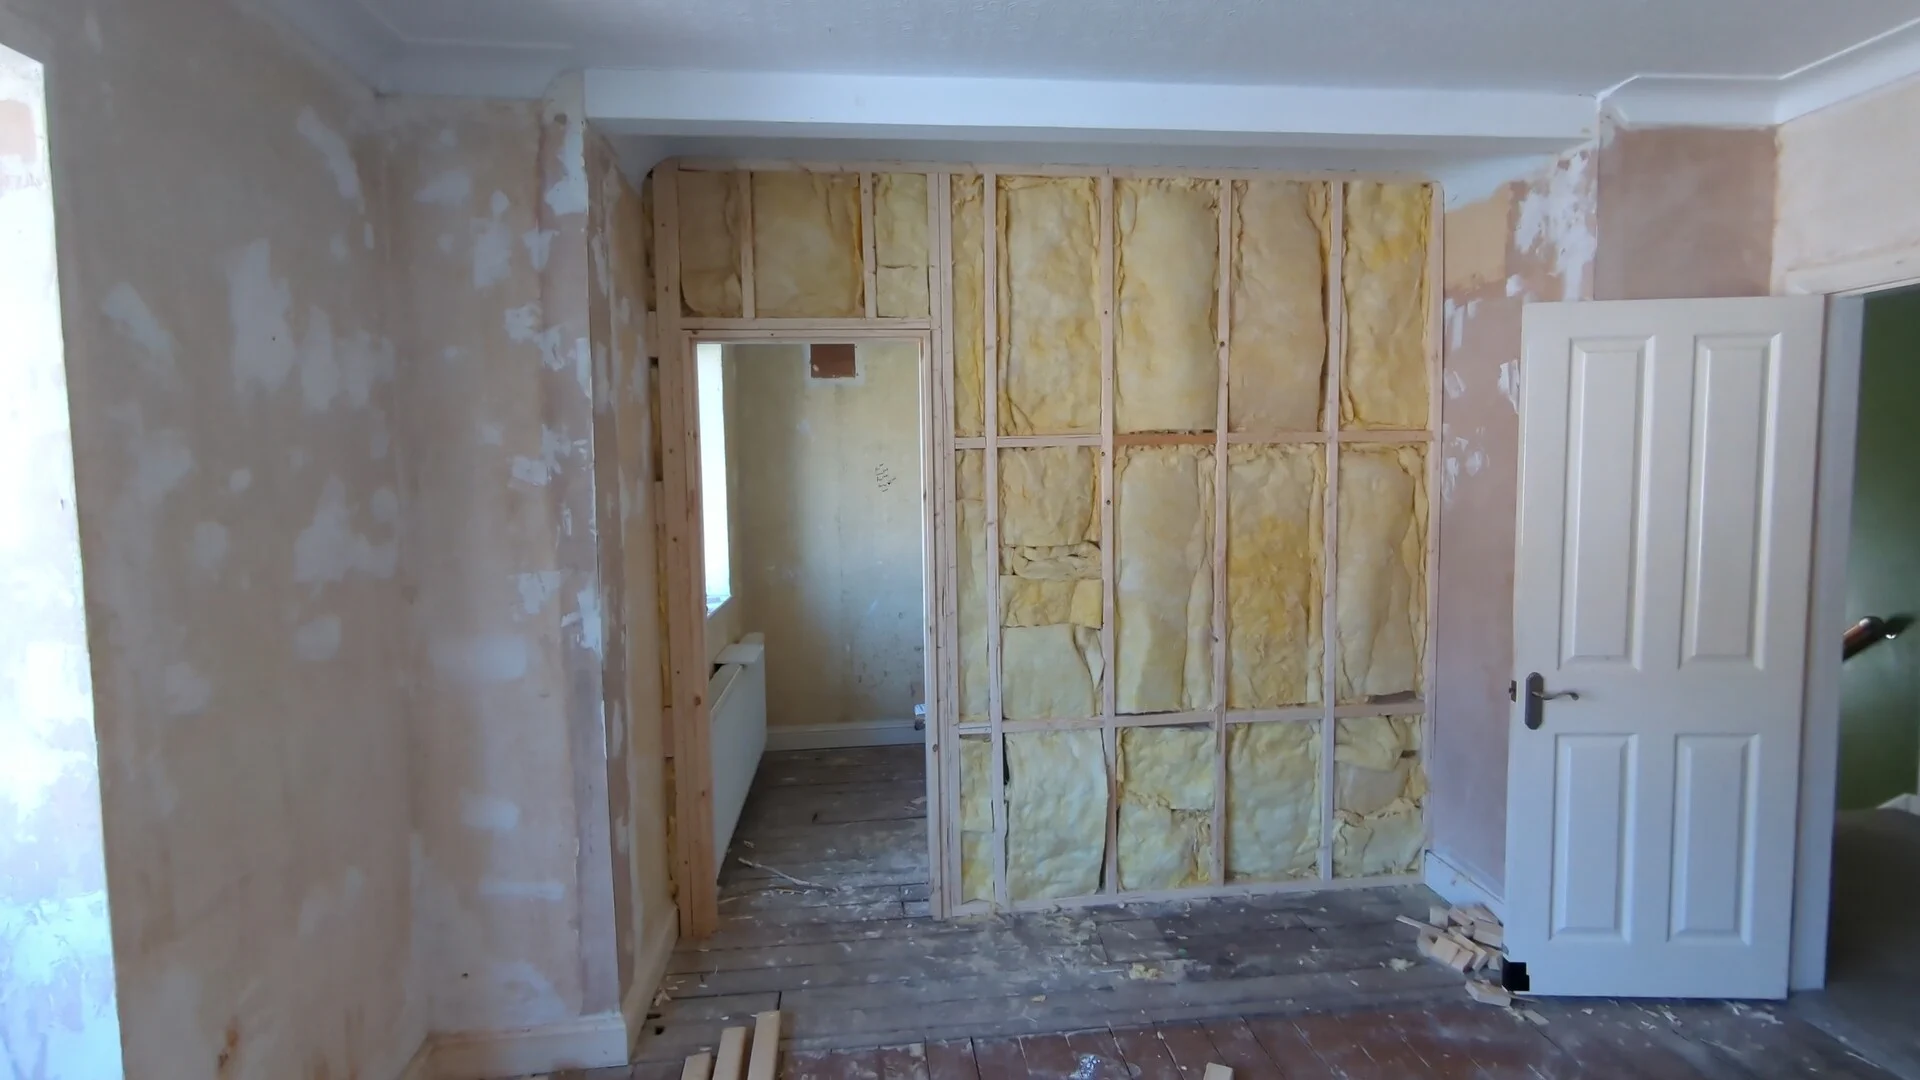
Before boarding the second side, the cavities were filled with mineral-wool insulation.
This is an internal, non-load-bearing wall, but insulation earns its keep here: it cuts sound transmission between the en-suite and the room next door, and it gets rid of that hollow sound you get from an empty stud wall.
The insulation was cut to fit between the studs without big gaps — full enough to fill the cavity, but not rammed in tight.
10. Completing the wall and hanging the door
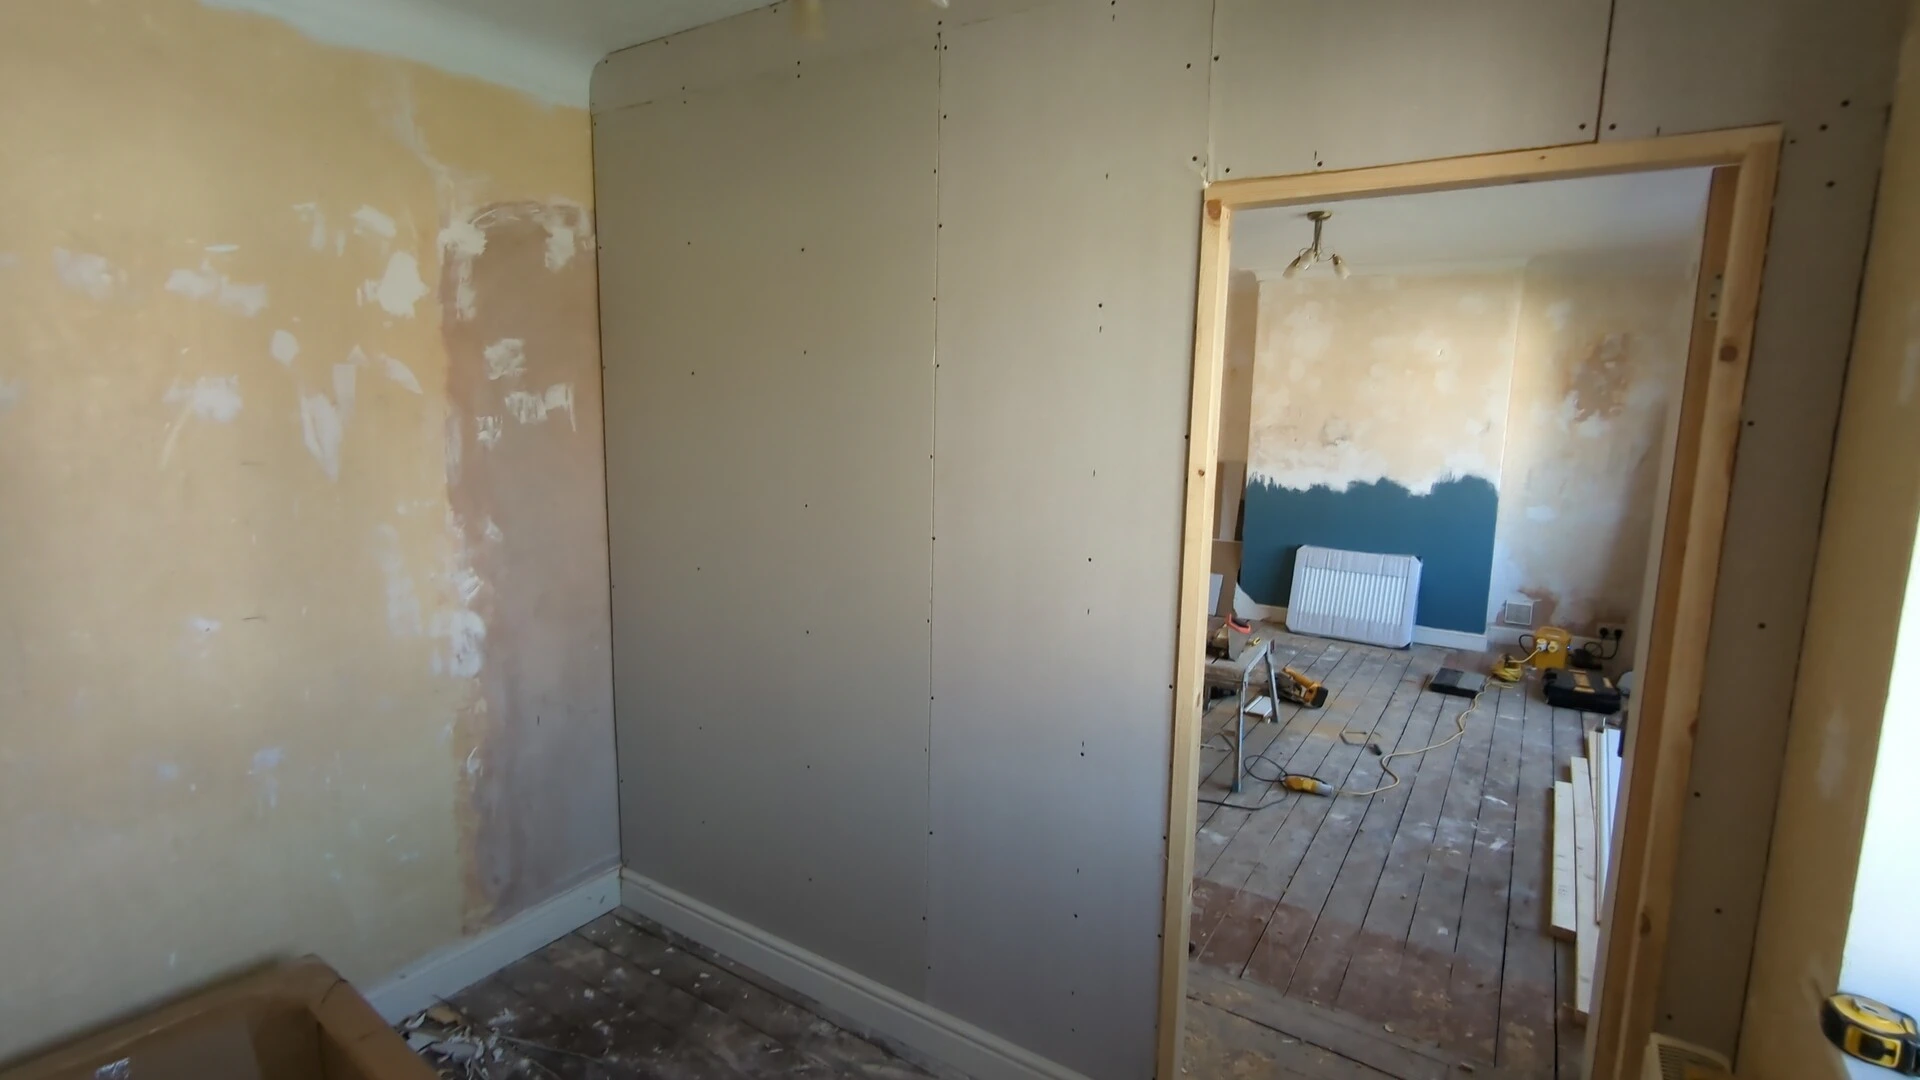
With the insulation in, the second side was boarded and made ready for finishing. The door was then hung, adjusted and fitted with its furniture. Because the opening had been reinforced with doubled studs, the lining and hinges had a firm structure behind them.
The result: a straight, rigid partition wall and a properly defined en-suite, without unnecessary disruption to the rest of the room.
Key points when building a stud partition wall
A good stud wall comes down to accurate preparation:
- Confirm the exact position of the wall
- Mark plumb lines at both ends
- Check the new room for square
- Measure the plasterboard before choosing stud centres
- Set out every stud from the same reference point
- Reinforce door openings with doubled timber
- Check every stud for plumb and alignment
- Fit enough noggins to stiffen the wall
- Board one side before installing insulation
- Make sure every plasterboard edge is fully supported
Why accurate setting out matters
Mistakes made at the setting-out stage get more obvious as the job goes on. A few millimetres’ difference between board size and stud spacing looks like nothing at the first sheet — then it accumulates across the wall until the joints stop landing on the studs.
The same goes for line and plumb. A small error at the start becomes an uneven doorway, awkward boarding and a visibly crooked wall by the end. Careful setting out saves time later and gives a stronger, neater result. That’s first fix carpentry done properly — and it’s what makes the second fix look right.
Stud partition walls in West Yorkshire
Heritage Joiners builds and alters internal stud walls and timber partition walls across West Yorkshire, for bedrooms, bathrooms, en-suites, offices and refurbishments — for homeowners and for builders. This job was in Doncaster, and we cover Doncaster alongside our usual patch. That covers new partition walls, internal door openings, door linings and door hanging, acoustic insulation, plasterboarding and alterations to existing layouts.
For stud wall construction or internal joinery in Pontefract, Wakefield, Doncaster or the surrounding Yorkshire area, get in touch — send a few photos of the room and Rob will give you a practical first view.